
by Pippa Teague, Strength Coach | May 14, 2019 | Back Pain, Injury, Injury Prevention, knee pain, Ladies, lifts, Neck Pain, Running, running help, strength training, Uncategorized, working with injury
By Loni Rodriguez,
Physical Therapist
Do you know what fires me up more than anything? It’s hearing a story from a client that begins with… “I felt like the doctor did not understand where I was coming from.”
You may not know this story, but I dealt with hip and low back pain for just over 2 years when I was going through graduate school. It came on gradually while running one day on the treadmill. It was sharp, came on strong and would not let go. It gradually persisted and ultimately led me to have to stop running all together. It derailed me and created a borderline depression around the fact that I was unable to exercise like I had wanted to. I went from running almost every day to dealing with persistent hip pain that I would feel first thing in the morning and be with me until the minute I went to bed. I would wake up wondering if it would just go away…
How I was going to be able to go out with friends? Sit at a baseball game? Go shopping? Play football with friends on the beach? It consumed me.
I went to a plethora of doctors and physical therapists, had injections, saw specialists and was convinced that my hip required surgery because one MRI found a cartilage tear. I was constantly searching for answers to the cause of my symptoms and coming up short time and time again. Fast forward 7 years, symptoms have improved dramatically and I no longer deal with persistent pain. I feel stronger and more resilient than ever… so what can I contribute it to? That is a question I do not have the answer to… yet, but is not the point of my story. I am not going to tell you I have the magic answer to solve all persistent pain like this… But I am damn sure I know what would have helped me along the way.
Looking back on this, I realized one common piece that I was missing. I didn’t have a healthcare provider that told me that I was going to get through this and they were going to guide me… that is all I wanted, someone to tell me they would lead me on a path to feeling better and more confident in my hip.
At 21 I had one person – a doctor, surgeon and low back pain specialist tell me that I was going to be dealing with pain for the rest of my life. I remember crying in my car after the session, not because I thought he was right, but because I knew he was wrong. I was more upset because I knew he was going to be giving that same screwed up advice to all the other poor souls in the waiting room. I knew that I had a better understanding of pain and did not want to take that answer as my fate.
I wanted someone to listen to my entire story and not seem like the details were obsolete. I remember creating a pain log to show one of my providers and they didn’t even look at it. Finally, overtime I gradually improved and found my way of returning to exercise – running, lifting weights, competing in CrossFit and running races without even thinking about my hip or low back. This took time and hard work, but I made it.
This is not how an experience with a medical professional should be. You should 110% be involved in your own plan and be guided in that direction.
Have you ever had an experience with this? Have you ever been a fly on the wall in this situation with a family member? How many times have you or someone you know had to accompany a family member at a doctors appointment because you do not remember what they said.
I would love to hear YOUR story…
It does not have to be like this! Seek other advice from someone who listens.
Thank you for taking the time to read and have an awesome rest of the week!

by Pippa Teague, Strength Coach | May 6, 2019 | Abdominals, Breathing, Diaphragm, Stressrelief, Uncategorized
By Anna Burns, PT, DPT
Infinite Potential Physical Therapist
One of the simplest things you can do for your core, your pain, and your stress level is to breathe. When working out or concentrating, it’s always the first thing to go. Our diaphragm is directly connected with our nervous system. When our nervous system is on high alert with pain, stress, anxiety, or fear, engaging our diaphragm can switch the nervous system from “fight or flight” to “rest and digest,” decreasing pain and stress levels. It’s one of our best tools to manage pain.
We have adopted a couple of different ways of breathing that “get around” the diaphragm. One is breathing with the upper chest; this breath is “emergency” breathing, a very shallow pattern that we perform when we are stressed or scared. Click HERE for an example of Emergency Breathing
Another way is “belly breathing,” in which we distend our bellies outward on purpose. While the belly rising is normal with inhalation, it should not be consciously distended. Click HERE for an example of Belly Breathing
Optimal breath engages our diaphragm, a large muscle that sits under our lungs and over our stomach. By breathing into this area that touches all aspects of the rib cage, the diaphragm contracts to expand the surface area for oxygen intake in our lungs. When we exhale completely, the diaphragm relaxes to push out the stale air. To activate your diaphragm, breathe in through your nose (CLICK HERE FOR VIDEO). Visualize a balloon in that area expanding as you inhale. Exhale slowly through your mouth, deflating the balloon, as far as you can until you have no air left. Pause a second, and then inhale again through your nose. Try not to bulge out your belly on purpose or move your back. In fact, I love practicing this laying on my back. So take a mindful moment (or several!) throughout your day to breathe. As one of our clients likes to say, “Breathing is NOT optional!”
by Pippa Teague, Strength Coach | May 1, 2019 | Conditioning, Exercise advice, Jumprope, strength training, Uncategorized
By Pippa Teague NASM CPT, WS
Infinite Potential Personal Trainer, Orangetheory coach, Professional Figure Skating Coach
I love double unders and jump rope in general but I know dubs don’t come easy to everyone and there are some tricks and tips that can help!
In general, jump rope is a great conditioning tool. As a competitive figure skater I would use it frequently to warm up in the rink and before competitions. It is light and easy to bring to smaller spaces and gets that heart rate up fast!
Being effiecent in jump rope and getting those dubs will help to improve the following:
-Speed
-Coordination
-Endurance
-Body control
-Strength
-Power
-Reaction speed
Here is my guide to achieving your first double under.
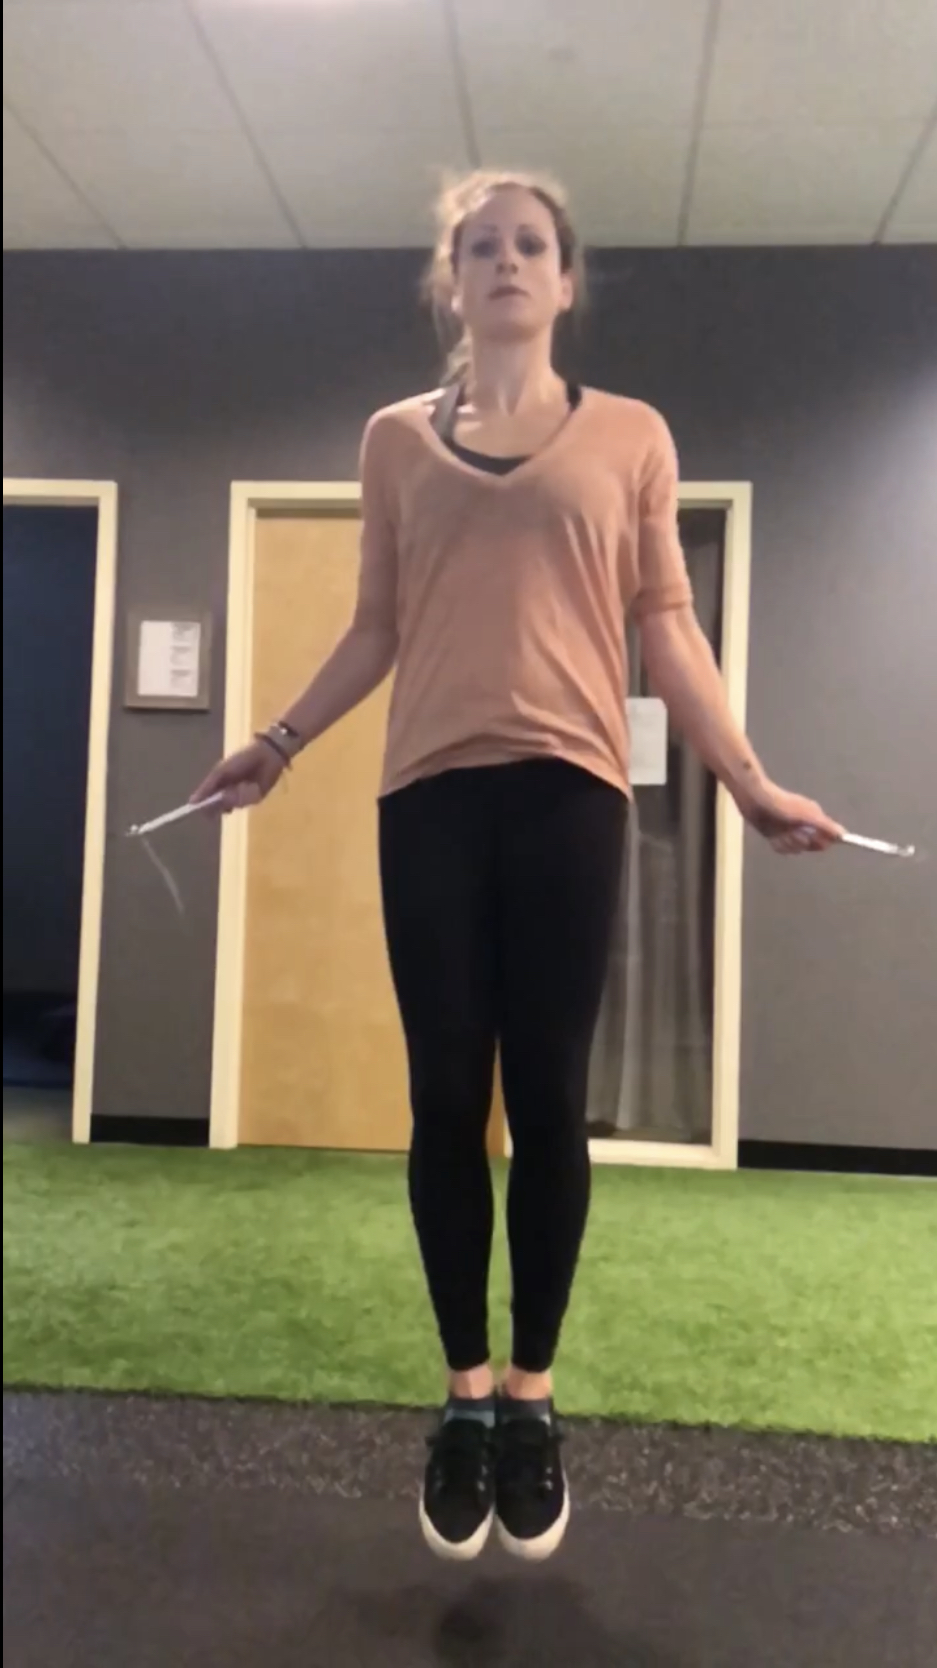
First make sure you are efficient with your single unders. Be able to quickly manage about 20 in a row unbroken. A big mistake I see very often is trying to make large circles with the arms in order to bring the rope through. Try to keep your wrists and arms close to your side. A trick to help is to squeeze a rolled up towel under each arm. As you jump the wrists actually flick down. So think about your thumb turning a tight circle towards the ground as you jump upwards. Timing should be even and smooth. Focus on one point in front of you.
Single unders
Double under timing.
Penguin taps:
Without the rope jump up and tap your legs twice. This is how fast you need to be doing the flick motion with your wrists. The jump itself should not change, you want to jump higher for the double under but legs should look the same. Often times people will bend the knees up in a tuck fashion. Try to avoid this. Toes should still leave the ground last and legs stay straight.
Once you feel like you have the singles down you should start trying a couple of doubles mixed in. Use the timing of the singles to help flow you into a double so it might be something like single-single-single -double-single
When you can manage this, try to get two in a row. The hardest part is the timing and jumping straight into the next one.
Double unders
Good luck and tag me in your double under journey !
by Pippa Teague
Infinite Potential Personal Trainer, Orangetheory coach, Professional figure skating coach
NASM CPT, WS

by Pippa Teague, Strength Coach | Apr 30, 2019 | Exercise advice, Pushups, strength training, Uncategorized
By Jenny Gusella, ACE, CFSC, Personal Trainer and Orangetheroy Fitness Coach
Push-ups are a staple of any workout program from youth to adulthood. You don’t need any equipment, you can do them anywhere, and they are easy to modify them to make them simpler as well as more advanced. However, according to anecdotal evidence I’ve gathered from my clients, push-ups are among the more dreaded of the exercises we do. Reasons range from “I’ve just never been able to do them” to “I feel so weak, I can’t even do one” to “Can’t I just do them from my knees?”
Usually, in life, when a situation isn’t going the way we want, we make an effort to fix it. We aim to improve our situation so we can move on and be happier. If you are someone who dreads push-ups, we can fix your situation, and, if you progress properly, it will feel empowering, not defeating.
Why fix it? First of all, it’s one of the best bang-for-your-buck exercises out there, working your chest, arms, core and even your legs all at once – if you have it in your arsenal, you open up opportunity for greater strength gains. Second of all, push-ups are revealing themselves to be a great indicator of cardiovascular health. A recent study published in the JAMA Network open found that men who could do more push-ups were less likely to experience cardiovascular issues, with those who could do 40 or more seeing the greatest risk reduction. That’s not to say if you just get good at push-ups your heart will become healthy, but practicing some push-ups and seeing where you need improvement may inspire you to pick up a more complete fitness routine (including push-ups, of course!) which will ultimately lead to a healthier heart.
Now, let’s meet you where you’re at to determine how to tackle these push-ups! Find which statement below applies to you, start there, then work your way down as you get more proficient. When you practice push-ups, try to aim for 3 sets of around 8-12 reps.
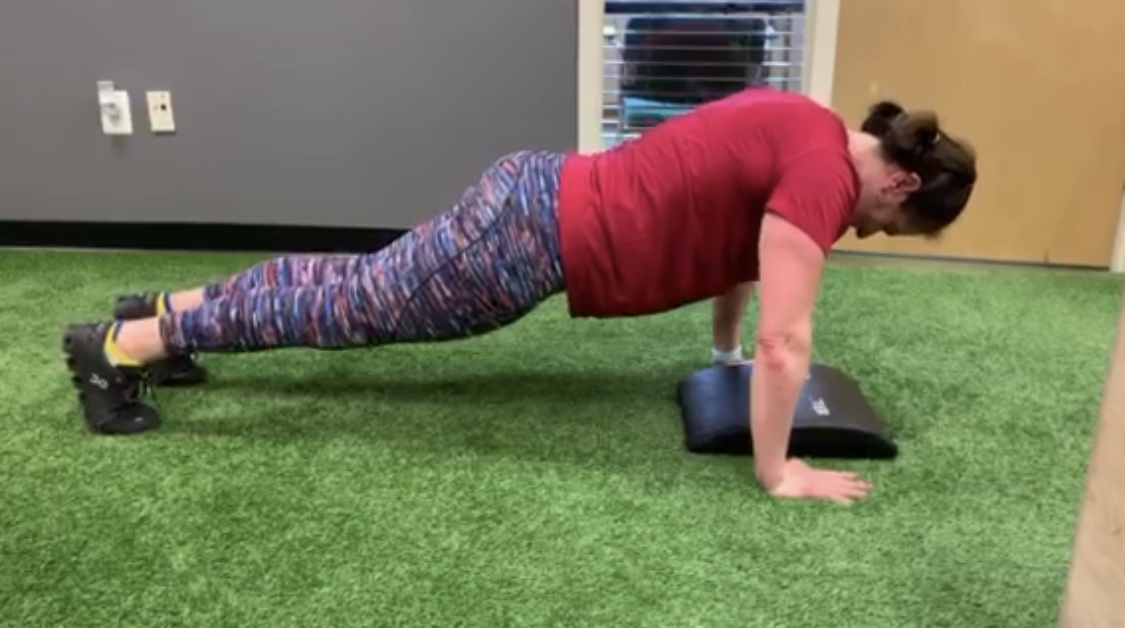
1. “I cannot hold the top of a push-up” If you can’t hold a high plank (from your hands) then you will not yet be able to perform a push-up, so let’s start there. Try holding a plank for 10 seconds. Make sure your wrists are right under your shoulders, your back is flat enough to hold a mug of coffee on top, and your butt isn’t way up in the air. Increase your plank hold by 5 seconds every few days. By the time you can hold a plank for 30 straight seconds, you’re ready to move on.
2. “I cannot do 1 full push-up” Let’s start by elevating your hands. Find something like a bureau, set yourself up in a plank position with your hands on the edge, and perform a push-up with your chest coming all the way to touch the bureau. Was that easy? Then find a lower piece of furniture, maybe your dining room table, or a coffee table. The lower your hands are, the more difficult the push-up will be. Once you find an elevation that’s challenging for about 8-10 reps (but you can complete it) then find a lower piece of furniture!
3. “I can do a couple but my form really falls apart” Let’s go back to basics. A perfect push-up should start as a perfect plank, then when you lower down, your chest and your hips lower at the exact same rate, and your elbows stay tucked in at least 45 degrees to your body. Keep your eyes looking a few inches in front of you so your head doesn’t drop. Your chest should be able to touch a small pad on the ground below you. Practice doing as many perfect ones as you can, and then do the rest of your push-ups back at step 2 with your hands elevated.
4. “I’m happy with how many push-ups I can do” That’s great! Some fun ways to make them more challenging could be: slow down the tempo, lower to the count of “3…2…1”. Elevate your feet, make sure to stay in that perfect plank. When you push up, jump your hands up into the air. Or try doing push-ups on just 1 foot.
Last step: add some fun music to your routine! Might I suggest “Push It” by Salt-n-
by Pippa Teague, Strength Coach | Apr 23, 2019 | Abdominals, Shoulders, strength training, Uncategorized
Guest Editorial
By Kerry Moynihan
Fit for life after 50
Certified Personal Trainer
Am I the only one amused by the often inventive and entertaining names used for exercises in the fitness world? Deadlifts, Skull Crushers and Crunching, to name just a few, create bone-chilling imagery as you’re just trying to get that pain-free one hour workout in. Or Inchworms, Bird Dogs and Flutter Kicks which have us daydreaming of Earth’s renewal on a lovely May morning rather than working that core to its max.
Regardless of name or the imagery created, only one man can lay claim to having a fabulously effective exercise named just for him…..no bone-chilling moniker, nothing Spring Day about it. It’s The Arnold Press.
Seven time Mr. Olympia, Arnold Schwarzenegger, created the Arnold Press during his illustrious bodybuilding career in the early 1970’s. He can still lay claim as one of the most successful and influential figures in bodybuilding and is credited with inventing this press which targets the anterior, lateral and posterior deltoids (three shoulder muscles). Think: Summer Shoulders.
As with any exercise, form first.
To start: Seated position. Back straight. Feet planted on the floor. Keep core tight and braced throughout.
Grasp a dumbbell in each hand. Start with a very manageable weight to get the motion of the exercise.
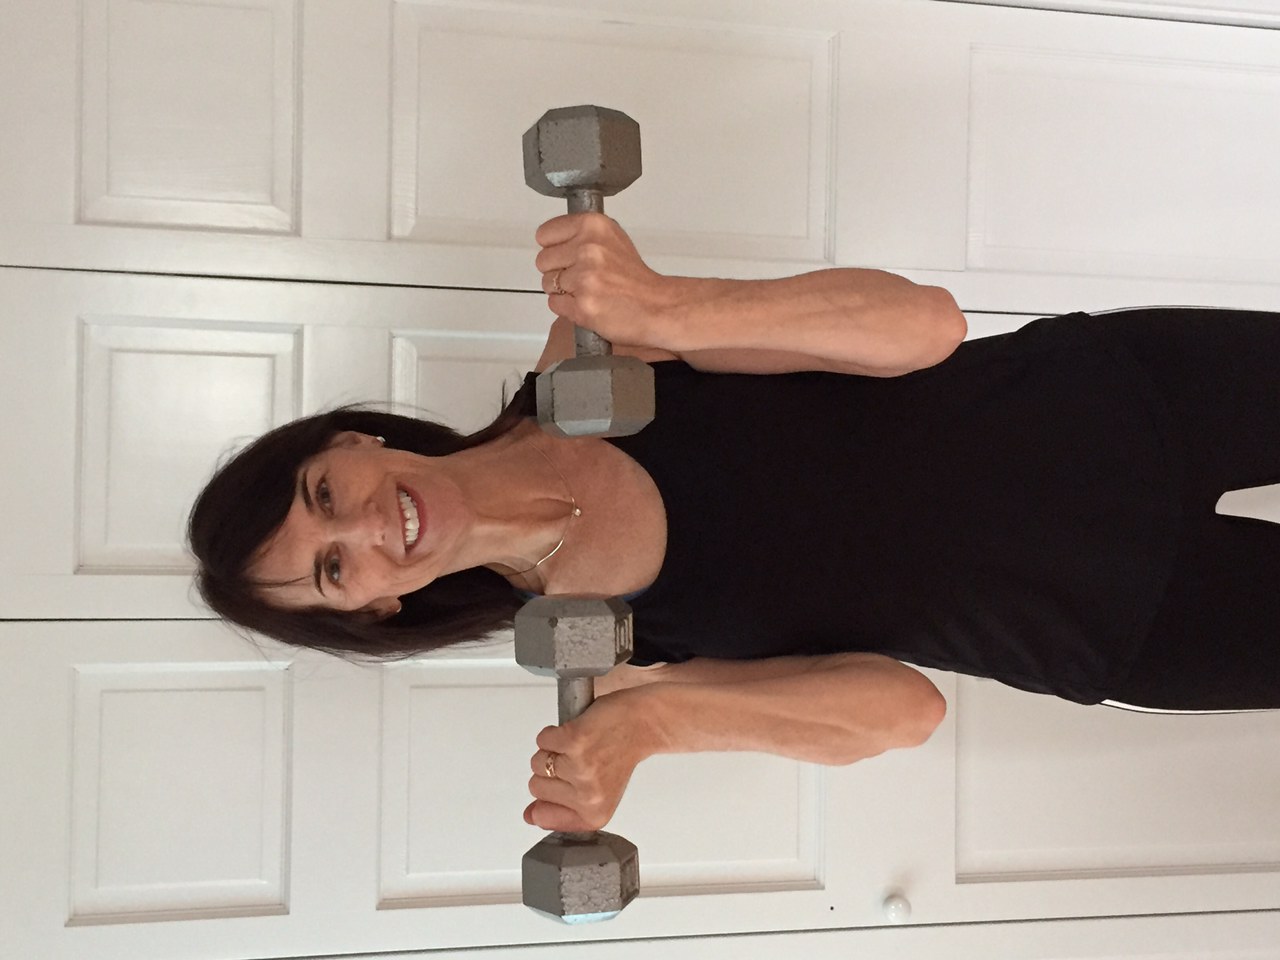
Curl the weights up to the shoulders. Hold the dumbbells at shoulder level with palms facing the body.
In a controlled manner, slowly press the dumbbells simultaneously upwards and rotate your hands to a forward position until you have fully extended your arms upward. Slowly (with control) lower the weight down by reversing the exercise and repeat the movement.
The true work of the Arnold Press is the downward motion of the weight returning to the starting position.
Not guaranteeing a Mr. or Ms. Olympia title, but when you master the proper mechanics of the Arnold Press, it truly is a great addition to your upper body workout.
Kerry Moynihan
ACE Certified Personal Trainer

by Pippa Teague, Strength Coach | Apr 2, 2019 | Uncategorized
By Pippa Teague, Infinite Potential Strength Coach
I have had the pleasure to work with many young athletes over the past few years, both on and off the ice. Power development is important not only in figure skating but in many sports including lacrosse, hockey, and gymnastics to name a few.
In the world of figure skating, being able to jump high and create power on the ice is essential if you want to land those double and triple jumps. This article provides a few exercises to help develop and improve vertical jump height and power for figure skating.
Before setting out in these exercises it is important to first have a solid base of strength and conditioning. Power is being able to apply strength quickly!
Proper form completing exercises such as squats, lunges, plyometric drills, hip extensions (bridges) and upper body strength all contribute to improving jump height and power.
Depth Jumps
This is performed by jumping or dropping off a box and then immediately rebounding into another jump right after, as soon as your feet hit the ground. This works on reactive timing and power. It can be done to a vertical jump, another box or a hurdle.
Seated box jumps
Start sitting on one box, legs at a 90 degree angle. From that position bring arms back and drive through feet to jump up to another box in front. This box can be equal or higher that the box you are sitting on. This eliminates the stretch reflex that happens in a normal plyometric jump and trains the concentric action only which is great for building explosive power.
Single leg box jumps
This develops unilateral power and strength. As skaters take off from one leg in all jumps, it is important to mimic this movement biomechanically to build the strength, power and stability that can be taken onto the ice.
Standing on one leg without using a step, drive the arms backwards and bend at the knee and ankle. Jump and land onto the box with a soft landing.
*All of these exercises can be done with additional load- dumbbells or weight vest is recommended. Adding weight will force the athlete to over compensate in the jump, forcing them to increase power and explosiveness.
Exercises can also be regressed by decreasing the height of the box!
___________
