by Pippa Teague, Strength Coach | May 22, 2019 | Breathing, Conditioning, Flexibility, Foam rolling, Injury Prevention, strength training, Stretching, Uncategorized
Pippa Teague, Strength Coach
Infinite Potential Physical Therapy
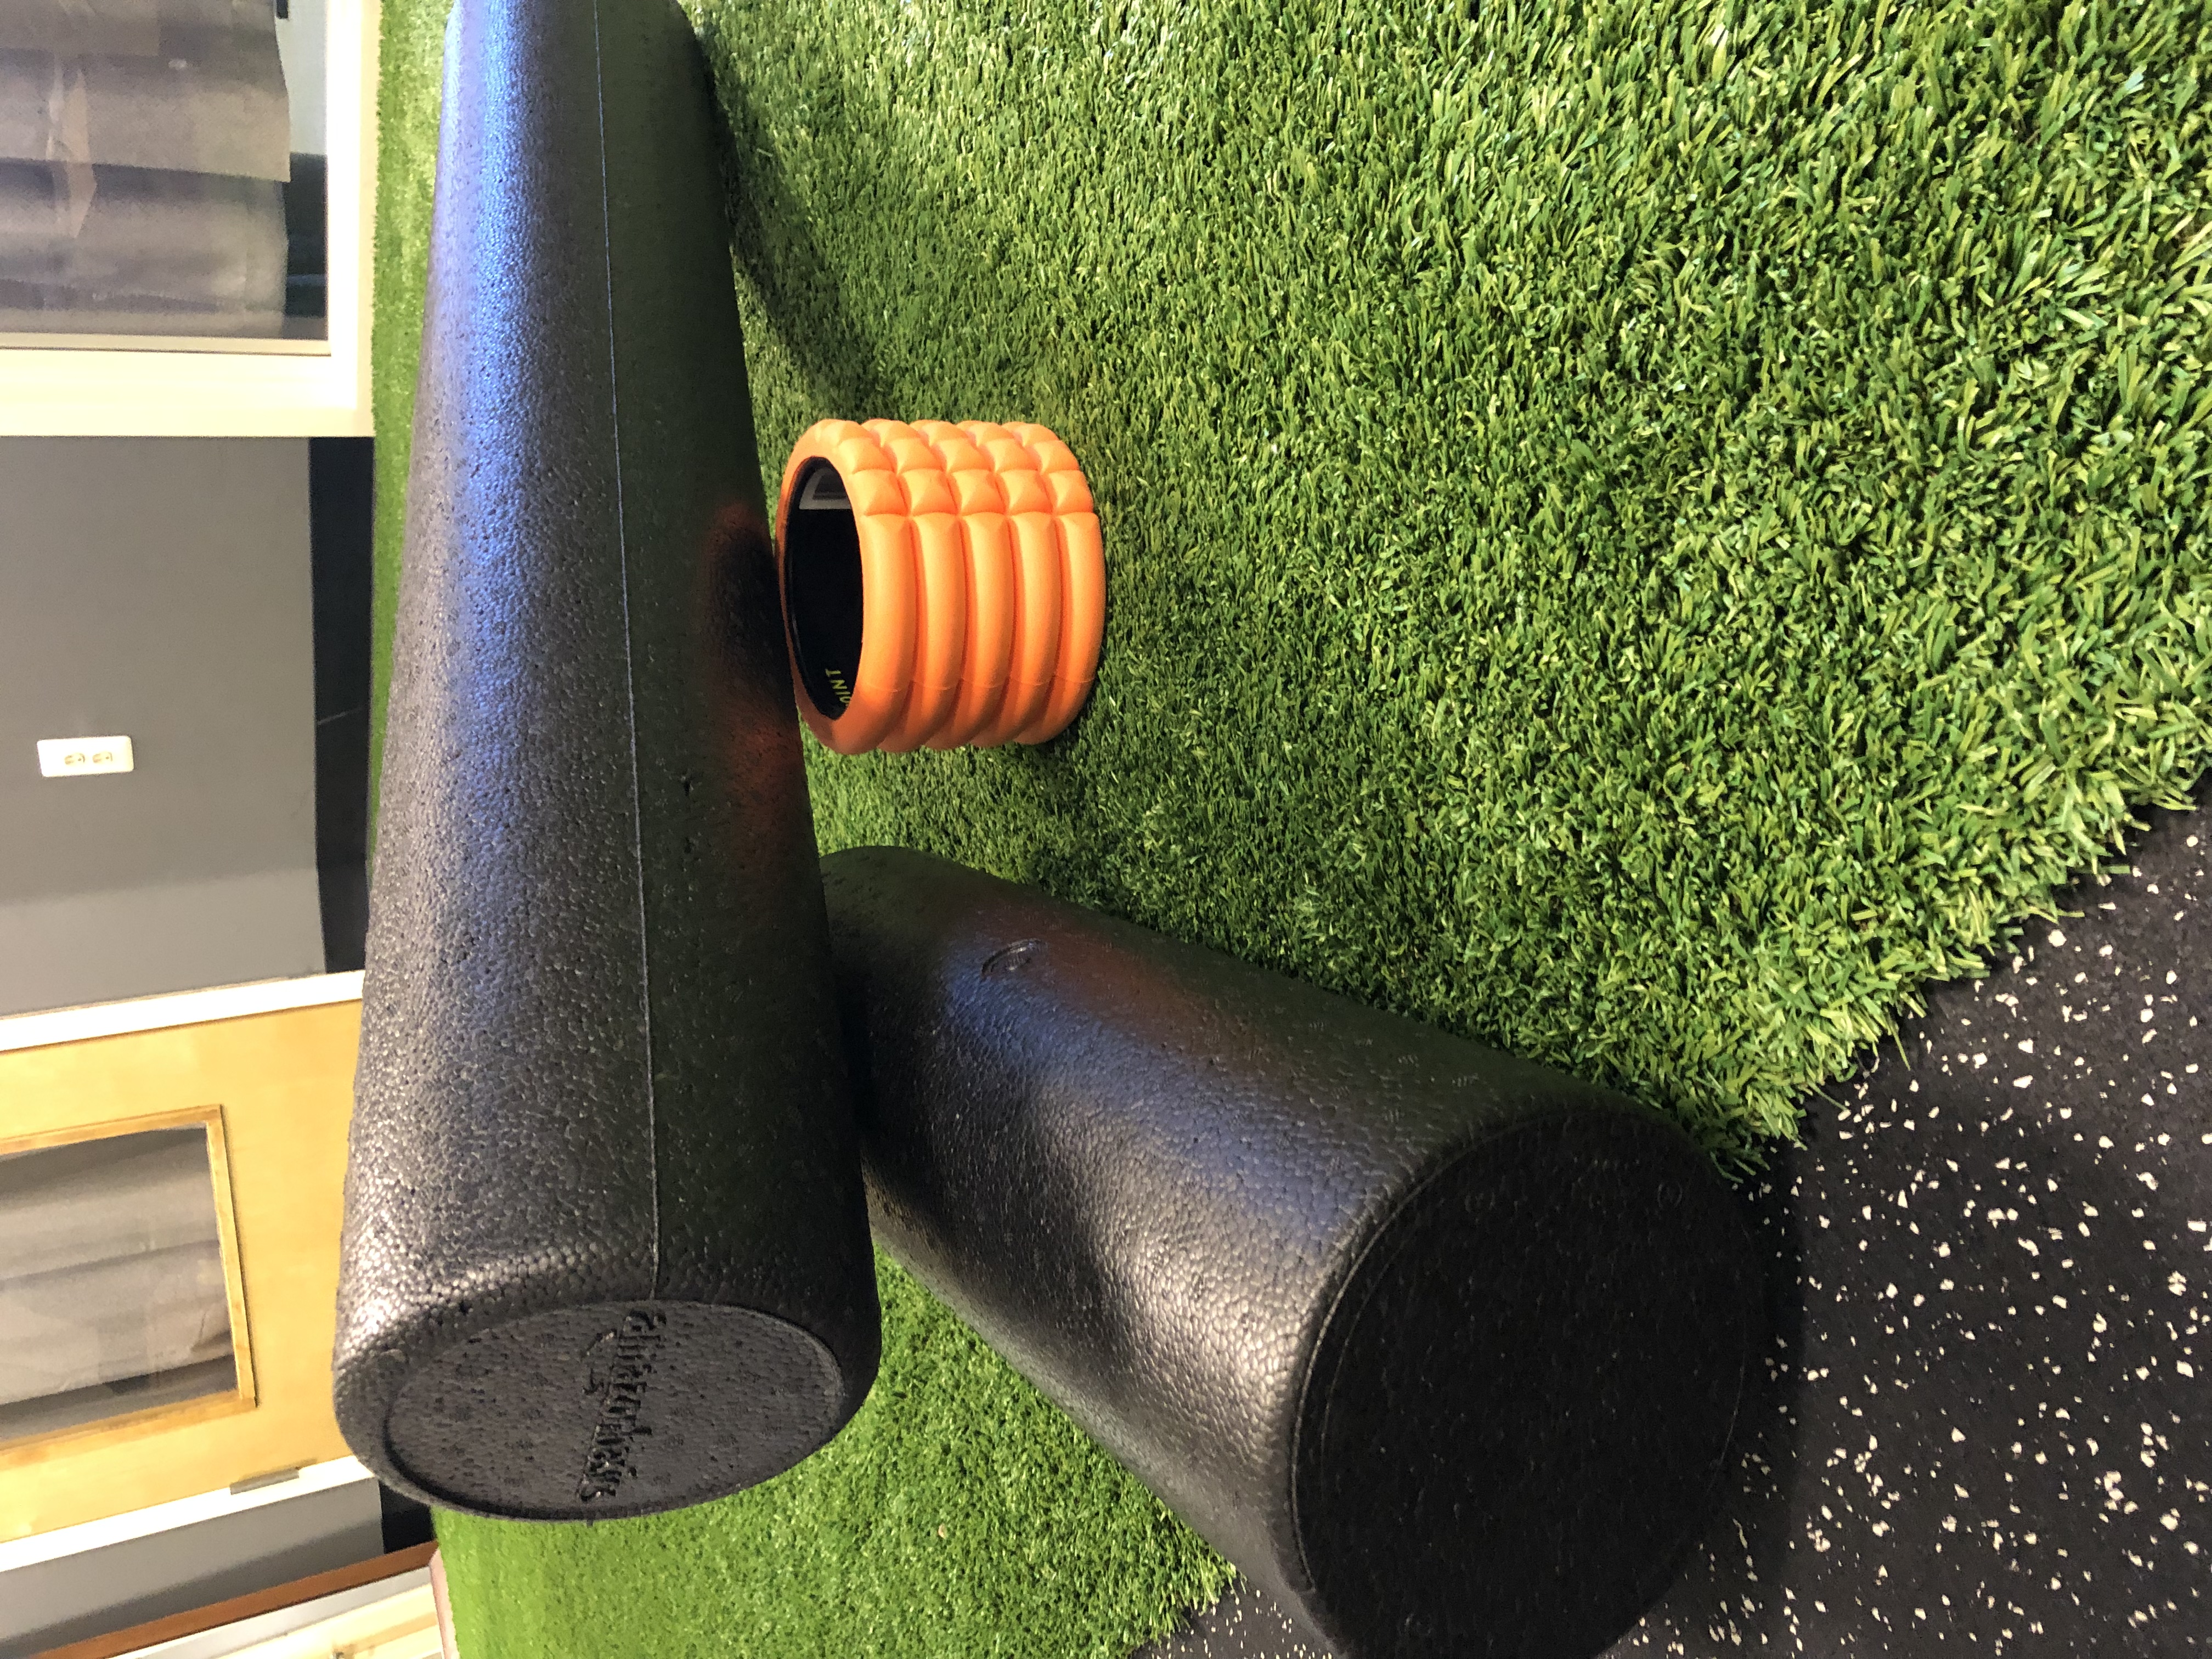
So.. what the heck IS foam rolling exactly? Well, it is rolling parts of your body (muscles) on a foam roller giving yourself your own “massage” or some might say “self myofacial release”.
It is frequently used to promote recovery, flexibility and athletic performance. However, as everyone began to become obsessed with it over the past few years, we have learned more about what it DOES NOT do verses what is DOES do. It has NOT been proven to provide long term effects on recovery, perform, OR flexibility. Short term effects on flexibility? Sure. Long term (what we really want)..? Not so much.
The widely accepted theory is that foam rolling / lacrosse balling / super nova-ing is a way to “release” fascia (soft tissue surrounding all organs, muscles, bones and nerve fibers), adhesions, muscular restrictions, etc. This restriction, adhesion or tightness of this fascia causes decreased joint range of motion and blood flow.
Here is the real deal.. to actually CHANGE the tissue that is underneath your skin (aka fascia) you need a SIGNIFICANTLY higher force than a human exerting it on themselves would need to be used! So let’s get one thing straight.. you ARE NOT releasing anything..
So why are we getting those short-term improvements in flexibility, pain relief, etc..?
The theory is that foam rolling CAN stimulating the nervous system to relax which in addition will improve pain tolerance. Similar to other things like stretching, deep breathing and meditation..
Our Advice? USE IT IF YOU LIKE IT AND UNDERSTAND THAT IT PROVIDES SHORT TERM EFFECTS ONLY.
Apply during your warm up (no more than 2-3 mins)
5-10 passes over each muscle group
We know that more does not mean improved outcomes…
So.. in short. Foam rolling or self mobilization can give you short term gains in flexibility, decrease muscle soreness and pain. KEY WORD IS SHORT TERM! What can it do long term? …..? Unsure.
If you foam roll and you feel like it helps you in your workouts and promotes recovery, then keep it up! If you foam roll and are in agony and doesn’t seem to help you then giving it a miss might not be a bad idea!
Learn how your body reacts and do what feels good!

by Pippa Teague, Strength Coach | May 14, 2019 | Back Pain, Injury, Injury Prevention, knee pain, Ladies, lifts, Neck Pain, Running, running help, strength training, Uncategorized, working with injury
By Loni Rodriguez,
Physical Therapist
Do you know what fires me up more than anything? It’s hearing a story from a client that begins with… “I felt like the doctor did not understand where I was coming from.”
You may not know this story, but I dealt with hip and low back pain for just over 2 years when I was going through graduate school. It came on gradually while running one day on the treadmill. It was sharp, came on strong and would not let go. It gradually persisted and ultimately led me to have to stop running all together. It derailed me and created a borderline depression around the fact that I was unable to exercise like I had wanted to. I went from running almost every day to dealing with persistent hip pain that I would feel first thing in the morning and be with me until the minute I went to bed. I would wake up wondering if it would just go away…
How I was going to be able to go out with friends? Sit at a baseball game? Go shopping? Play football with friends on the beach? It consumed me.
I went to a plethora of doctors and physical therapists, had injections, saw specialists and was convinced that my hip required surgery because one MRI found a cartilage tear. I was constantly searching for answers to the cause of my symptoms and coming up short time and time again. Fast forward 7 years, symptoms have improved dramatically and I no longer deal with persistent pain. I feel stronger and more resilient than ever… so what can I contribute it to? That is a question I do not have the answer to… yet, but is not the point of my story. I am not going to tell you I have the magic answer to solve all persistent pain like this… But I am damn sure I know what would have helped me along the way.
Looking back on this, I realized one common piece that I was missing. I didn’t have a healthcare provider that told me that I was going to get through this and they were going to guide me… that is all I wanted, someone to tell me they would lead me on a path to feeling better and more confident in my hip.
At 21 I had one person – a doctor, surgeon and low back pain specialist tell me that I was going to be dealing with pain for the rest of my life. I remember crying in my car after the session, not because I thought he was right, but because I knew he was wrong. I was more upset because I knew he was going to be giving that same screwed up advice to all the other poor souls in the waiting room. I knew that I had a better understanding of pain and did not want to take that answer as my fate.
I wanted someone to listen to my entire story and not seem like the details were obsolete. I remember creating a pain log to show one of my providers and they didn’t even look at it. Finally, overtime I gradually improved and found my way of returning to exercise – running, lifting weights, competing in CrossFit and running races without even thinking about my hip or low back. This took time and hard work, but I made it.
This is not how an experience with a medical professional should be. You should 110% be involved in your own plan and be guided in that direction.
Have you ever had an experience with this? Have you ever been a fly on the wall in this situation with a family member? How many times have you or someone you know had to accompany a family member at a doctors appointment because you do not remember what they said.
I would love to hear YOUR story…
It does not have to be like this! Seek other advice from someone who listens.
Thank you for taking the time to read and have an awesome rest of the week!

by Pippa Teague, Strength Coach | May 6, 2019 | Abdominals, Breathing, Diaphragm, Stressrelief, Uncategorized
By Anna Burns, PT, DPT
Infinite Potential Physical Therapist
One of the simplest things you can do for your core, your pain, and your stress level is to breathe. When working out or concentrating, it’s always the first thing to go. Our diaphragm is directly connected with our nervous system. When our nervous system is on high alert with pain, stress, anxiety, or fear, engaging our diaphragm can switch the nervous system from “fight or flight” to “rest and digest,” decreasing pain and stress levels. It’s one of our best tools to manage pain.
We have adopted a couple of different ways of breathing that “get around” the diaphragm. One is breathing with the upper chest; this breath is “emergency” breathing, a very shallow pattern that we perform when we are stressed or scared. Click HERE for an example of Emergency Breathing
Another way is “belly breathing,” in which we distend our bellies outward on purpose. While the belly rising is normal with inhalation, it should not be consciously distended. Click HERE for an example of Belly Breathing
Optimal breath engages our diaphragm, a large muscle that sits under our lungs and over our stomach. By breathing into this area that touches all aspects of the rib cage, the diaphragm contracts to expand the surface area for oxygen intake in our lungs. When we exhale completely, the diaphragm relaxes to push out the stale air. To activate your diaphragm, breathe in through your nose (CLICK HERE FOR VIDEO). Visualize a balloon in that area expanding as you inhale. Exhale slowly through your mouth, deflating the balloon, as far as you can until you have no air left. Pause a second, and then inhale again through your nose. Try not to bulge out your belly on purpose or move your back. In fact, I love practicing this laying on my back. So take a mindful moment (or several!) throughout your day to breathe. As one of our clients likes to say, “Breathing is NOT optional!”
by Pippa Teague, Strength Coach | May 1, 2019 | Conditioning, Exercise advice, Jumprope, strength training, Uncategorized
By Pippa Teague NASM CPT, WS
Infinite Potential Personal Trainer, Orangetheory coach, Professional Figure Skating Coach
I love double unders and jump rope in general but I know dubs don’t come easy to everyone and there are some tricks and tips that can help!
In general, jump rope is a great conditioning tool. As a competitive figure skater I would use it frequently to warm up in the rink and before competitions. It is light and easy to bring to smaller spaces and gets that heart rate up fast!
Being effiecent in jump rope and getting those dubs will help to improve the following:
-Speed
-Coordination
-Endurance
-Body control
-Strength
-Power
-Reaction speed
Here is my guide to achieving your first double under.
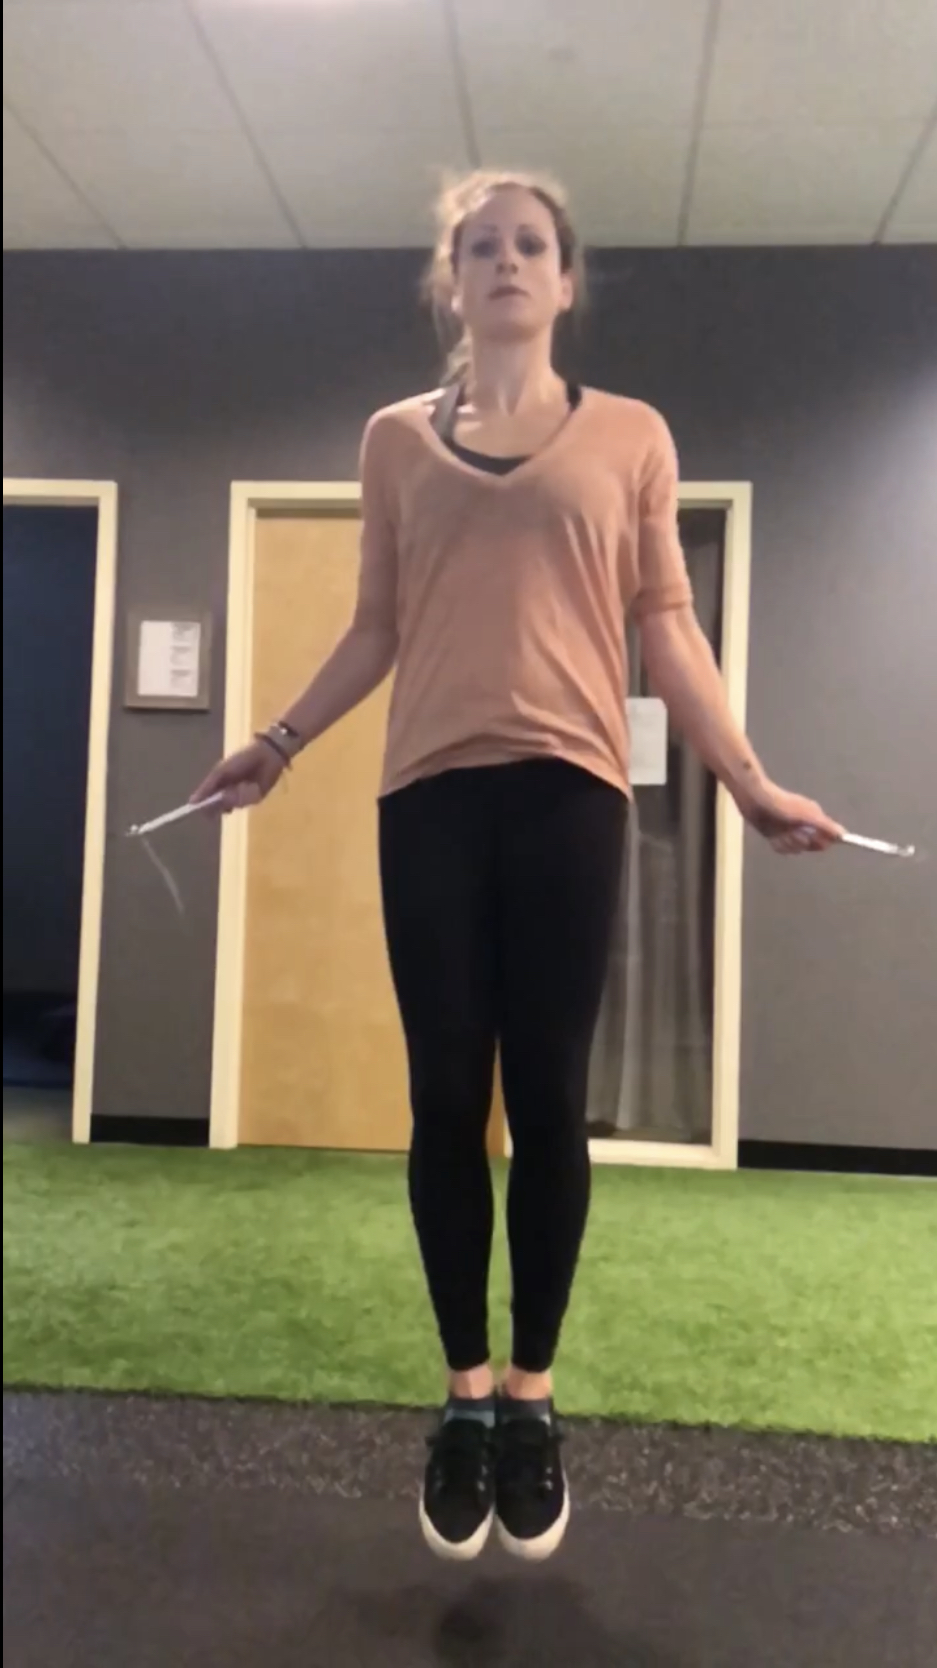
First make sure you are efficient with your single unders. Be able to quickly manage about 20 in a row unbroken. A big mistake I see very often is trying to make large circles with the arms in order to bring the rope through. Try to keep your wrists and arms close to your side. A trick to help is to squeeze a rolled up towel under each arm. As you jump the wrists actually flick down. So think about your thumb turning a tight circle towards the ground as you jump upwards. Timing should be even and smooth. Focus on one point in front of you.
Single unders
Double under timing.
Penguin taps:
Without the rope jump up and tap your legs twice. This is how fast you need to be doing the flick motion with your wrists. The jump itself should not change, you want to jump higher for the double under but legs should look the same. Often times people will bend the knees up in a tuck fashion. Try to avoid this. Toes should still leave the ground last and legs stay straight.
Once you feel like you have the singles down you should start trying a couple of doubles mixed in. Use the timing of the singles to help flow you into a double so it might be something like single-single-single -double-single
When you can manage this, try to get two in a row. The hardest part is the timing and jumping straight into the next one.
Double unders
Good luck and tag me in your double under journey !
by Pippa Teague
Infinite Potential Personal Trainer, Orangetheory coach, Professional figure skating coach
NASM CPT, WS
by Pippa Teague, Strength Coach | Apr 30, 2019 | Exercise advice, Pushups, strength training, Uncategorized
By Jenny Gusella, ACE, CFSC, Personal Trainer and Orangetheroy Fitness Coach
Push-ups are a staple of any workout program from youth to adulthood. You don’t need any equipment, you can do them anywhere, and they are easy to modify them to make them simpler as well as more advanced. However, according to anecdotal evidence I’ve gathered from my clients, push-ups are among the more dreaded of the exercises we do. Reasons range from “I’ve just never been able to do them” to “I feel so weak, I can’t even do one” to “Can’t I just do them from my knees?”
Usually, in life, when a situation isn’t going the way we want, we make an effort to fix it. We aim to improve our situation so we can move on and be happier. If you are someone who dreads push-ups, we can fix your situation, and, if you progress properly, it will feel empowering, not defeating.
Why fix it? First of all, it’s one of the best bang-for-your-buck exercises out there, working your chest, arms, core and even your legs all at once – if you have it in your arsenal, you open up opportunity for greater strength gains. Second of all, push-ups are revealing themselves to be a great indicator of cardiovascular health. A recent study published in the JAMA Network open found that men who could do more push-ups were less likely to experience cardiovascular issues, with those who could do 40 or more seeing the greatest risk reduction. That’s not to say if you just get good at push-ups your heart will become healthy, but practicing some push-ups and seeing where you need improvement may inspire you to pick up a more complete fitness routine (including push-ups, of course!) which will ultimately lead to a healthier heart.
Now, let’s meet you where you’re at to determine how to tackle these push-ups! Find which statement below applies to you, start there, then work your way down as you get more proficient. When you practice push-ups, try to aim for 3 sets of around 8-12 reps.
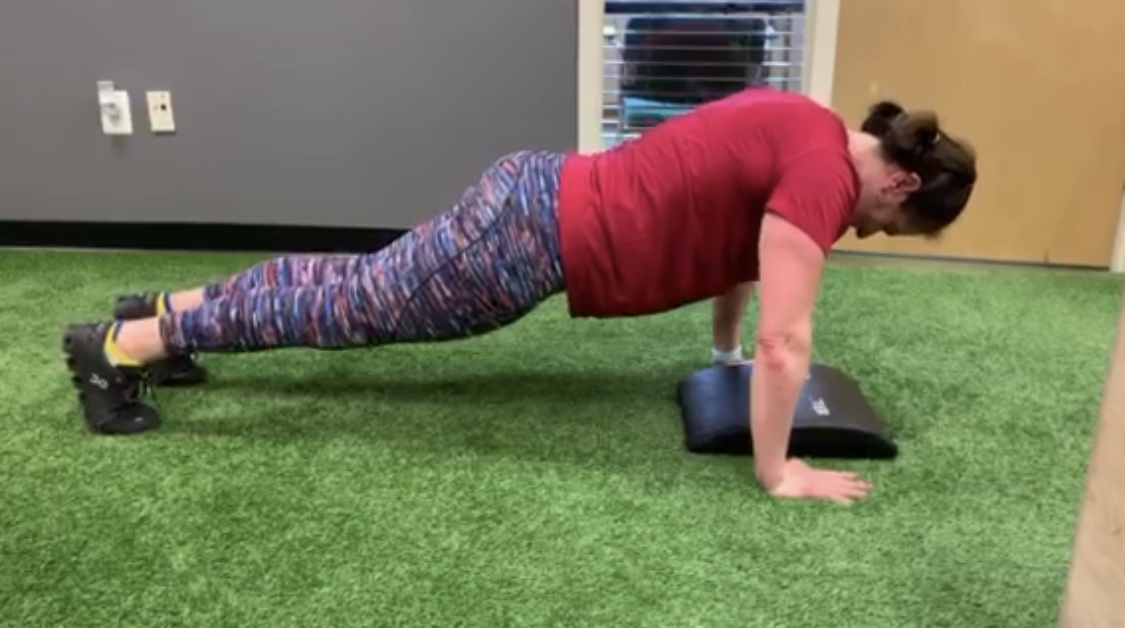
1. “I cannot hold the top of a push-up” If you can’t hold a high plank (from your hands) then you will not yet be able to perform a push-up, so let’s start there. Try holding a plank for 10 seconds. Make sure your wrists are right under your shoulders, your back is flat enough to hold a mug of coffee on top, and your butt isn’t way up in the air. Increase your plank hold by 5 seconds every few days. By the time you can hold a plank for 30 straight seconds, you’re ready to move on.
2. “I cannot do 1 full push-up” Let’s start by elevating your hands. Find something like a bureau, set yourself up in a plank position with your hands on the edge, and perform a push-up with your chest coming all the way to touch the bureau. Was that easy? Then find a lower piece of furniture, maybe your dining room table, or a coffee table. The lower your hands are, the more difficult the push-up will be. Once you find an elevation that’s challenging for about 8-10 reps (but you can complete it) then find a lower piece of furniture!
3. “I can do a couple but my form really falls apart” Let’s go back to basics. A perfect push-up should start as a perfect plank, then when you lower down, your chest and your hips lower at the exact same rate, and your elbows stay tucked in at least 45 degrees to your body. Keep your eyes looking a few inches in front of you so your head doesn’t drop. Your chest should be able to touch a small pad on the ground below you. Practice doing as many perfect ones as you can, and then do the rest of your push-ups back at step 2 with your hands elevated.
4. “I’m happy with how many push-ups I can do” That’s great! Some fun ways to make them more challenging could be: slow down the tempo, lower to the count of “3…2…1”. Elevate your feet, make sure to stay in that perfect plank. When you push up, jump your hands up into the air. Or try doing push-ups on just 1 foot.
Last step: add some fun music to your routine! Might I suggest “Push It” by Salt-n-
by Pippa Teague, Strength Coach | Apr 23, 2019 | Abdominals, Shoulders, strength training, Uncategorized
Guest Editorial
By Kerry Moynihan
Fit for life after 50
Certified Personal Trainer
Am I the only one amused by the often inventive and entertaining names used for exercises in the fitness world? Deadlifts, Skull Crushers and Crunching, to name just a few, create bone-chilling imagery as you’re just trying to get that pain-free one hour workout in. Or Inchworms, Bird Dogs and Flutter Kicks which have us daydreaming of Earth’s renewal on a lovely May morning rather than working that core to its max.
Regardless of name or the imagery created, only one man can lay claim to having a fabulously effective exercise named just for him…..no bone-chilling moniker, nothing Spring Day about it. It’s The Arnold Press.
Seven time Mr. Olympia, Arnold Schwarzenegger, created the Arnold Press during his illustrious bodybuilding career in the early 1970’s. He can still lay claim as one of the most successful and influential figures in bodybuilding and is credited with inventing this press which targets the anterior, lateral and posterior deltoids (three shoulder muscles). Think: Summer Shoulders.
As with any exercise, form first.
To start: Seated position. Back straight. Feet planted on the floor. Keep core tight and braced throughout.
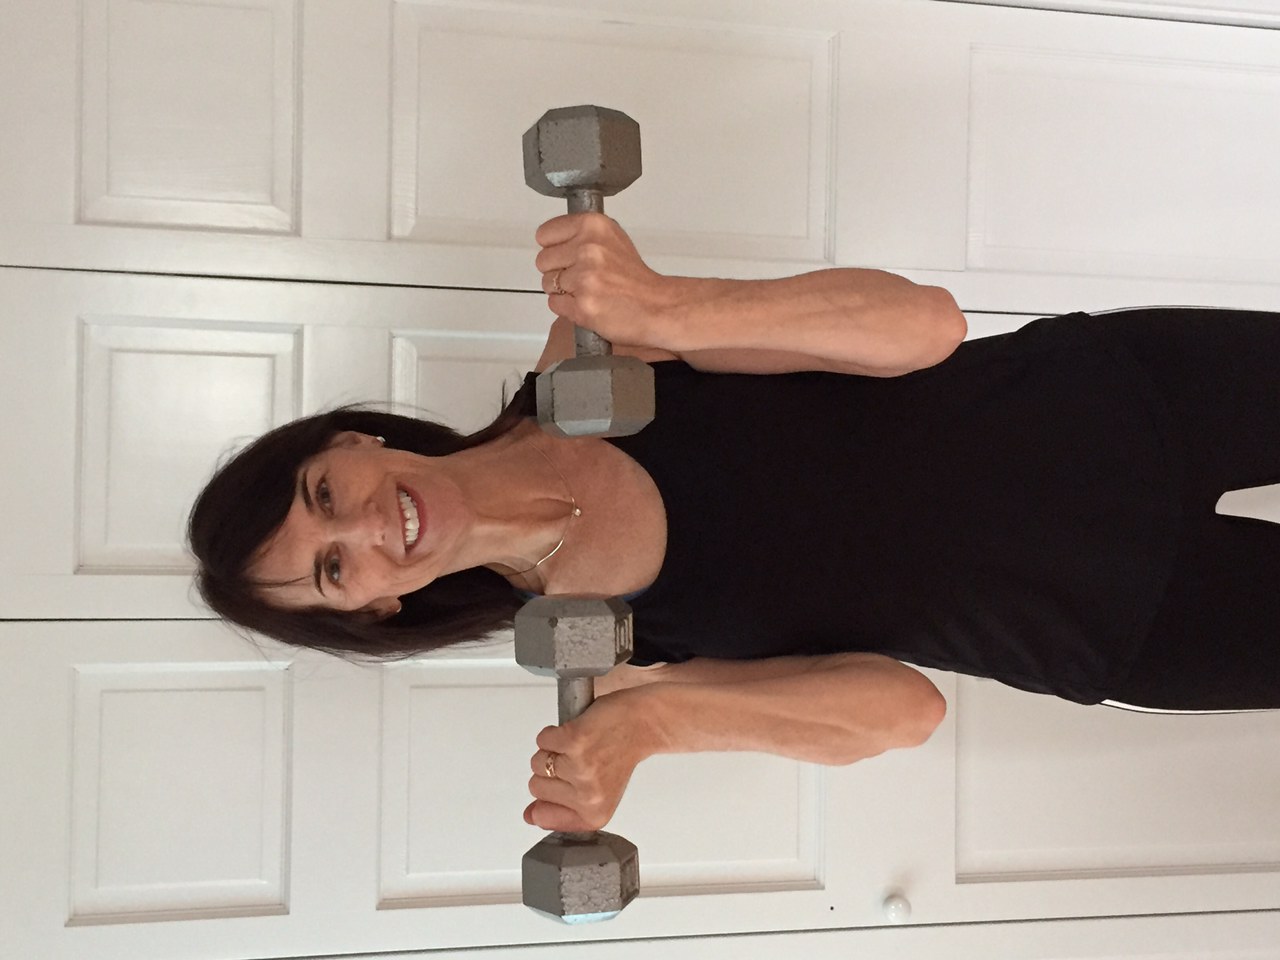
Grasp a dumbbell in each hand. Start with a very manageable weight to get the motion of the exercise.
Curl the weights up to the shoulders. Hold the dumbbells at shoulder level with palms facing the body.
In a controlled manner, slowly press the dumbbells simultaneously upwards and rotate your hands to a forward position until you have fully extended your arms upward. Slowly (with control) lower the weight down by reversing the exercise and repeat the movement.
The true work of the Arnold Press is the downward motion of the weight returning to the starting position.
Not guaranteeing a Mr. or Ms. Olympia title, but when you master the proper mechanics of the Arnold Press, it truly is a great addition to your upper body workout.
Kerry Moynihan
ACE Certified Personal Trainer

by Pippa Teague, Strength Coach | Apr 16, 2019 | Exercise advice, Flexibility, Stretching
By Loni Rodriguez, PT
Infinite Potential Physical Therapy and Wellness
Many of us work at desk jobs, commute to work sitting in a car or on a train? You are basically sitting all day. That can’t be good for you, RIGHT?! Sitting is the new smoking…
Actually, that is a myth. Sitting is not killing us! Recent research has shown is that it is much more common to develop chronic disease from what we consume, how poorly we sleep and how much stress we endure on a regular basis. Sitting is not actually BAD for you and it is more important to be focused on modifying the foods we munch on, the alcohol we sip, our sleep quality and how much we allow stress to affect us. Those are all modifiable, at least much more modifiable than changing jobs…
Let’s rethink this for a minute… If you can not modify your job to be able to stand more frequently, I am telling you that that is okay! Doesn’t that make you feel better already? Put you at ease a bit? Sitting is not hurting you, it is not a direct cause of low back pain, or any pain for that matter. Sure, more movement throughout the day is definitely better than being sedentary. However, there are plenty of very active people who deal with health issues and pain and there are many very healthy people that sit all day. Just let that sink in a bit.
Want a good warm up and full-body mobility routine you can perform without equipment? I have provided you with a grouping of exercises below that take you through a full range of motion of all joints throughout your body. Each of the exercises can be modified by not going as deep into the postures. Click the link below to view the 5-minute routine.
5-MINUTE FULL BODY FLEXIBILITY ROUTINE
Besides the above routine that can be easily performed a few times per day, my best recommendations are listed below:
Focus on your recovery vs doing MORE. I suggested the above routine, but sometimes we focus more on what we should be doing for exercises versus modifying our daily routine.
SLEEP
Try and achieve 7-8 hours of QUALITY sleep.
HYDRATION
Shoot for drinking one half your body weight of water in ounces.
STRESS
Take some time daily to breathe, be mindful, and not let stress build. This can dramatically affect your levels of pain and stiffness on a regular basis
NUTRITION
Simply eating a clean diet can improve your overall energy levels, pain, and stiffness.
MOVE AS OFTEN AS YOU CAN
The more you can get up, the better! Take calls on a walk, plan walking meetings with the team, have a goal to take a walk at lunch 3 days per week.
By following the above advice over time, you will notice a generalized reduction in stiffness throughout your day and improved energy levels!
by Pippa Teague, Strength Coach | Apr 8, 2019 | Ladies, strength training
by Anna Burns, PT, DPT
Infinite Potential Physical Therapist
There are SO many things to consider when pregnant, and physical activity is one of them. In the old days, women were advised to “take it easy” while pregnant. However now, the CDC recommends that pregnant women get at least 150 minutes of moderate-intensity aerobic activity every week. Ideally, a pregnant woman should be able to do any exercise she had been doing prior to pregnancy with a few modifications.
Here are a few things to avoid during exercise while pregnant:
- Laying on your back for more than 3 minutes after 20 weeks
- Exercising in a hot, humid environment, whether it’s outside or in a heated studio
- Performing inversion poses or any position where the hips are above the shoulders (handstands, bridges, etc.)
- Exercises that put pressure on the abdomen during mid-to-late pregnancy, have a risk of falling, or contact sports
- Over-stretching muscles
If you lift weights, here are a few guidelines and suggested modifications:
- Decrease your lifting load to 60-75% of your pre-pregnancy “one rep max.”
- Modify asymmetrical movements such as a split snatch or a split jerk if they cause pain in your pelvis.
- If your belly gets in the way with lifting from the floor, lift from blocks instead.
- Switch out front squats for back squats, as the front squats increase your intra-abdominal pressure (which is already increased by the presence of the baby).
Regardless of the type of exercise you participate in, watch for symptoms that signal you should STOP exercising and contact your healthcare provider immediately:
- Bleeding or leaking fluid from the vagina
- Feeling dizzy or faint
- Shortness of breath before starting exercise
- Chest pain
- Headache
- Muscle weakness
- Calf pain or swelling
- Regular, painful contractions of the uterus
You should always talk to your obstetrician or midwife before starting an exercise routine. Don’t let pregnancy leave you sitting around eating bonbons! The more active you can stay, the better you and your baby will feel, both during pregnancy and after delivery!
__________

by Pippa Teague, Strength Coach | Apr 2, 2019 | Uncategorized
By Pippa Teague, Infinite Potential Strength Coach
I have had the pleasure to work with many young athletes over the past few years, both on and off the ice. Power development is important not only in figure skating but in many sports including lacrosse, hockey, and gymnastics to name a few.
In the world of figure skating, being able to jump high and create power on the ice is essential if you want to land those double and triple jumps. This article provides a few exercises to help develop and improve vertical jump height and power for figure skating.
Before setting out in these exercises it is important to first have a solid base of strength and conditioning. Power is being able to apply strength quickly!
Proper form completing exercises such as squats, lunges, plyometric drills, hip extensions (bridges) and upper body strength all contribute to improving jump height and power.
Depth Jumps
This is performed by jumping or dropping off a box and then immediately rebounding into another jump right after, as soon as your feet hit the ground. This works on reactive timing and power. It can be done to a vertical jump, another box or a hurdle.
Seated box jumps
Start sitting on one box, legs at a 90 degree angle. From that position bring arms back and drive through feet to jump up to another box in front. This box can be equal or higher that the box you are sitting on. This eliminates the stretch reflex that happens in a normal plyometric jump and trains the concentric action only which is great for building explosive power.
Single leg box jumps
This develops unilateral power and strength. As skaters take off from one leg in all jumps, it is important to mimic this movement biomechanically to build the strength, power and stability that can be taken onto the ice.
Standing on one leg without using a step, drive the arms backwards and bend at the knee and ankle. Jump and land onto the box with a soft landing.
*All of these exercises can be done with additional load- dumbbells or weight vest is recommended. Adding weight will force the athlete to over compensate in the jump, forcing them to increase power and explosiveness.
Exercises can also be regressed by decreasing the height of the box!
___________
by Dr. Loni Rodriguez | Dec 17, 2018 | Exercise advice, Injury Prevention, lifts, Running, running help, squats, strength training
Why should runners strength train? PART II

Again, this post was inspired by Chris Johnson, my GO-TO for all things running!
For more information about Chris and some of the amazing content he has to offer, visit his website at Chris Johnson PT.
In the last post, we covered some of the benefits of strength training and the specific importance of this practice for runners. In this second piece, I will cover some of the most important and effective exercises that a runner’s strength training routine should include.
Dynamic Warm Up
This is often neglected by runners because it is easy just to get out and run. We want to allow adequate perfusion of blood to the necessary tissues and prepare the nervous system for the run itself. There is also likely too much time spent on unnecessary stretching. This stretching has little to no effect on injury prevention or preparing for the run.
Here are two recommended exercises that can be included in a dynamic warm up:
Hugging knee to chest
Quad stretch with overhead reach
The March
It is important for a runner to demonstrate solid single leg balance. Marching provides training for single leg balance that simulates running. It also allows for training of shortened stride length which can help reduce the risk of running related injuries.
Here are two recommended marching exercises:
Baseline marching with or without weights
Prisoner March
Lateral Toe Tap
This exercise is important to train the glute muscles. The glutes play a large role at reducing running related injuries, as they are large contributors to the activity of running itself. This exercise directly targets those glutes, challenges single leg balance and simulates running as it is an upright activity.
Here are two recommended lateral toe tap exercises:
Lateral toe taps with band
Single leg stance hip abduction
Step up (7-8” step)
This exercise challenges single leg stance just like the demands of life. It is important to focus on control, coordination, and timing with this one. It is NOT an exercise that should be challenging on the muscles but more on balance, quality, and form.
Here are two recommended step up exercises:
Standard step up
Fluid step up
The Bridge
This exercises is one of the most basic yet it is very important. It is also performed without equipment. It works on glutes, hamstrings, calves, low back, and abdominals
It is great for preventing knee pain in runners.
Here are two recommended bridge exercises:
Standard bridge
Bridge march
The Plank
This is NOT just a core exercise. It challenges the lateral hip musculature which is very important for runners. It is recommended to not jump too quickly into unstable surface work as you want to master these first.
Here are two recommended plank exercises:
Standard plank arms bent with or without knee taps
Standard plank arms straight with or without knee taps
Calf Raise
Calves can not be overlooked in training for the lower body as they are the powerhouse for distance running. Calf exercises can create tissue resiliency and build capacity to tolerate the demands of the sport and resistance to injury.
Here are two recommended calf exercises:
Isometric double leg calf raise
Isometric single leg calf raise
Squat
The squat is the most fundamental strength training exercise that is involved in everyday life. It has the ability to create full body resistance to running-related injuries.
Here are two recommended squat exercises:
Air squat
Goblet Squat
Loaded Carry
Life demands that we carry stuff. So why not train it? Loaded carries play a primary role in working with runners of all ages and abilities as it is important to get acquainted with being tall and upright.
Here is a recommended carry exercise:
Farmers carry march
Deadlift
This exercise, along with the squat is one of the most important functional exercises that every human should perfect. It is also extremely important for injury prevention. The correct form is crucial and introductory exercises for this movement are important to perfect.
Here are a few deadlift exercises to introduce you to to the movement:
Hip hinge with PVC
KB Deadlift
WANT MORE?!?!?!?!?
Interested in live group training that covers this content?
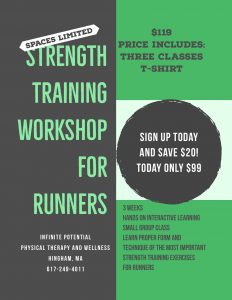
We will be hosting a 3-part series workshop held on 3 consecutive Wednesday’s in January from 6:30-7:30pm
JANUARY 9th, 16th, and 23rd.
This workshop will be located at our brand new office on 1 Derby Street in Hingham. Space is limited so please sign up ASAP!
Email Loni through loni@infinitepotentialptw.com or call 617-249-4011 x 700 for ANY and all questions!
Sign up through this link– choose the 6:30pm class on January 9th. Follow the prompts to complete registration.
 @